This tutorial was written for an older version of PTGui. HDR in PTGui 11 and later is covered in part 5 of the Video Tutorial series.
What is HDR?
 An important limitation in photography is dynamic range: on a sunny day, the contrast between
objects in the shadow and sunlit objects is often too high to be captured by a camera in a single photograph.
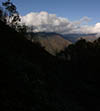
In a long exposure, shadow details will be visible, but bright areas in the image, such as the sky, will be overexposed,
often completely white.
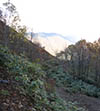
By shortening the exposure time, bright areas will be exposed properly, but darker objects will turn completely
black, or drown in the image noise. This limitation is apparent in particular in panoramic photography,
since a panorama captures a wider scene and is more likely to contain both highlights and shadows.
An important limitation in photography is dynamic range: on a sunny day, the contrast between
objects in the shadow and sunlit objects is often too high to be captured by a camera in a single photograph.
In a long exposure, shadow details will be visible, but bright areas in the image, such as the sky, will be overexposed,
often completely white.
By shortening the exposure time, bright areas will be exposed properly, but darker objects will turn completely
black, or drown in the image noise. This limitation is apparent in particular in panoramic photography,
since a panorama captures a wider scene and is more likely to contain both highlights and shadows.
High Dynamic Range (HDR) photography attempts to overcome this limitation, by combining multiple differently exposed photographs of the same scene (so called 'bracketed' exposures) into a single image. Such a combined image has a higher dynamic range, and is typically stored in a 32 bit per channel image file (regular jpeg files have only 8 bits). Since the contrast of a computer monitor and paper ink is limited as well, HDR images are tone mapped before display. Tone mapping makes local brightness adjustments to the image, to reduce the dynamic range such that it becomes suitable for display or print. For more information about HDR and tone mapping, see Wikipedia: HDR and Tone mapping.
Another approach to create a displayable image of a scene with a high dynamic range is called Exposure Fusion. This process is similar to HDR imaging, but it directly creates the tone mapped image from the bracketed exposures, skipping the step of generating the actual high dynamic range image. If one is only interested in the final tone mapped image, exposure fusion is the simpler alternative to true HDR imaging.
PTGui Pro provides extensive support for HDR imaging:
- Stitching bracketed exposures into an HDR panorama
- Stitching HDR source images into an HDR panorama
- Built in tone mapper, to create displayable images from an HDR panorama
- Exposure fusion of bracketed exposures straight into a tone mapped panorama
- Supports the following HDR file formats: 32 bit floating point TIFF, 32 bit PSD and PSB (for output only), OpenEXR (.exr) and Radiance (.hdr)
Photographing HDR panoramas
Photographing for HDR is done by taking several images of the same subject, varying the exposure. This is called 'bracketing'. The bracketed images are combined to HDR by taking only the properly exposed parts of each image.In a camera there are three parameters controlling the amount of light captured: the exposure time, the aperture (or 'f-number') and the sensitivity (or 'iso value'). Varying the aperture does not only change the amount of light captured, but also changes the depth of field. Similarly, varying the sensitivity (iso) also changes the amount of noise in the images, and the camera's noise reduction algorithm may behave differently. Therefore, ideally the only parameter that should be varied is the exposure time.
When stitching HDR panoramas in PTGui Pro, there is another requirement: for every exposure time, the whole panorama should be covered. Internally, PTGui Pro groups the source images by exposure and creates a panorama for each group of identically exposed images. Finally, these blended panoramas (called 'blend planes' in PTGui Pro) are merged into an HDR image. If a certain exposure time would be used for only one image, PTGui Pro would consider that single image to be a full blend plane. That single image would be HDR merged with a full panorama from another blend plane, resulting in ugly artefacts since the blend planes do not fully overlap.
Also, PTGui Pro will try to find out whether the source images are bracketed exposures, by looking for a repeating sequence in the exposure values. The exposure times for sets of 3 bracketed images could look like 1/100, 1/25, 1/400, 1/100, 1/25, 1/400, (etc).
So every image should be taken at the same set of exposures, and preferably in the same order. Most SLR cameras have an automatic bracketing function, which makes this easy. When auto bracketing is enabled, multiple images are taken in sequence, with varying exposure times. It is important to set the camera to Manual ('M') mode: in any other mode, the automatic exposure function would adjust the exposure times between shots, and the part of the scene with the sun in it would be taken at a different set of exposure times from the darker parts of the panorama. And the nice thing about HDR is that you don't have to worry much about 'proper' exposure, since bracketing ensures that everything will be exposed properly anyway!
You do need to find out which aperture and which range of exposure times to use in M mode. This can be done by temporarily switching to Av mode; choose an aperture and look at the exposure times your camera chooses when you point it at the highlights and the shadows in the scene. Copy the same aperture setting to the M mode, and choose an exposure time somewhere inbetween the indicated values for the highlights and shadows.
Unfortunately many digital compact cameras lack the M mode. This makes it nearly impossible to properly photograph HDR panoramas with a compact camera; you will probably need an SLR camera.
As with any (non HDR) panorama, don't forget to lock the camera's white balance!
A tripod is recommended, but not required. If the images were taken from a tripod, PTGui can 'link' the images, which causes the images in each bracketed set to be overlaid exactly. If the images were taken hand held however, the link feature should be disabled, and PTGui will attempt to align the images within each bracketed set as well. See below.
HDR workflow in PTGui Pro
We have the following images: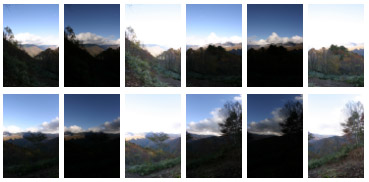
download original images (23 MB .zip file)
The images are 4 sets of 3 different exposures, taken in the Hida Mountains in Japan. Every set was taken at exposure times 1/80, 1/320 and 1/20 seconds. In the darker exposures, the sky is exposed properly, while the lighter images are exposed for the foreground.
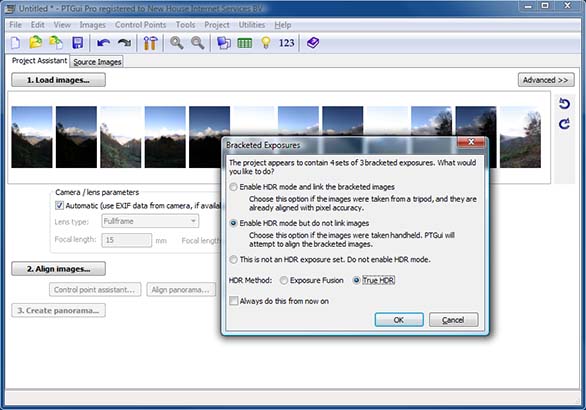
We launch PTGui Pro, load all source images and press Align Images. PTGui has detected that the images are bracketed exposures (because the exposure times follow a repeating pattern: 1/80, 1/320, 1/20, 1/80, 1/320, 1/20 and so on) and asks whether we want to link the bracketed images. Linked source images are treated as a single image: the images will get the same yaw, pitch and roll and their control points are combined. In this case however, the images were taken handheld and may not be aligned exactly. Therefore, we want PTGui to align them properly so we choose 'Enable HDR mode but do not link images'.
Further we can choose between the 'True HDR' or 'Image Fusion' workflow. The true HDR workflow first creates a high dynamic range panorama from our source images. Next, this HDR panorama is tone mapped into a regular low dynamic range image suitable for display or print. On the other hand the Image Fusion workflow directly creates the tone mapped panorama from the bracketed source images, skipping the intermediate HDR panorama. We will show both workflows, starting with 'True HDR':
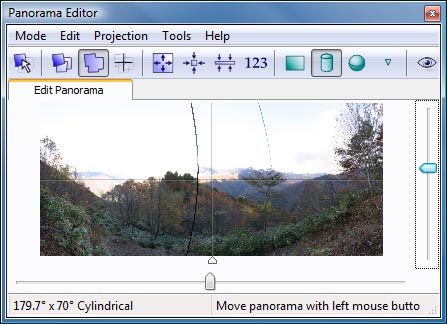
After analyzing the images and generating control points, the panorama editor shows the aligned images. Note that the panorama editor shows the warped source images, not yet merged to HDR. Since the bracketed exposures are stacked, only the topmost images are visible, in this case the ones with the longest exposure time. By switching the panorama editor to the 'Edit Individual Images' mode, the other images can be inspected using the numbered tabs.
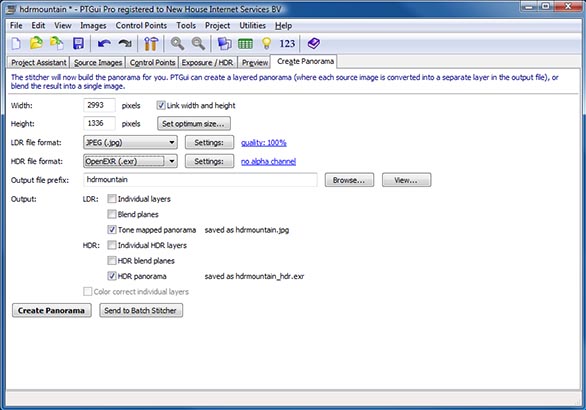
Go to the Create Panorama tab, enter an output file name, and select the EXR output format. As output components, choose both 'HDR panorama' and 'Tone mapped panorama':
Next, go to the Exposure / HDR tab and press the Tone Map Settings button. PTGui will create a small preview of the final HDR panorama. Tone mapping settings can be adjusted in this window:
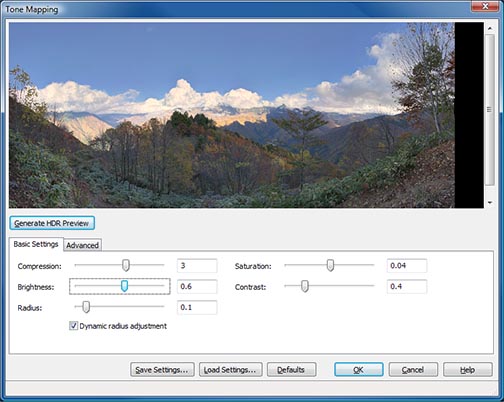
Adjust the sliders until the result look satisfactory and press OK to save the settings to the project.
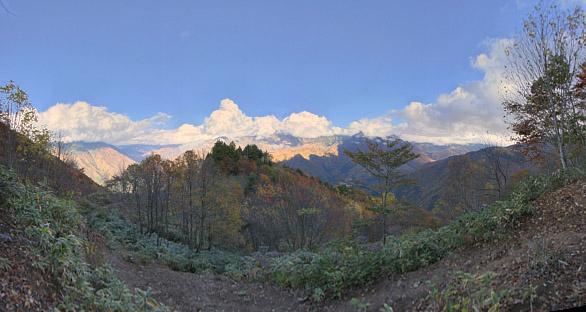
Finally, go back to the Create Panorama tab and press the Create Panorama button. This generates two files. One is a jpeg file containing the tone mapped panorama:
The second file is a high dynamic range .exr panorama. It cannot be displayed directly since it is a high dynamic range image, but it can be used for tone mapping in third party software or using the stand alone tone mapper accessible from the Utilities menu in PTGui. Another application for an HDR panorama is Image Based Lighting.
Exposure Fusion
If all we need is a tone mapped panorama suitable for display or print and we are not interested in the HDR panorama, the exposure fusion workflow is an easier way to accomplish this. We can switch from True HDR to Exposure Fusion in the Exposure / HDR tab: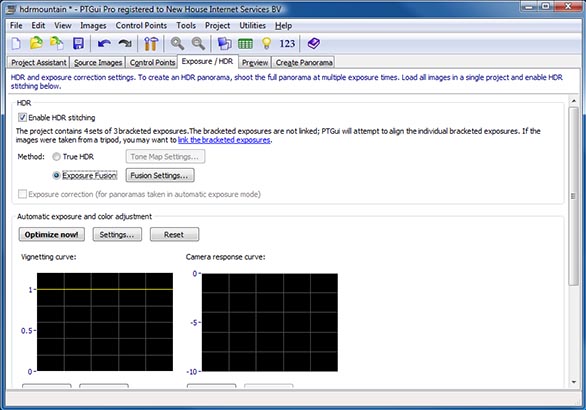
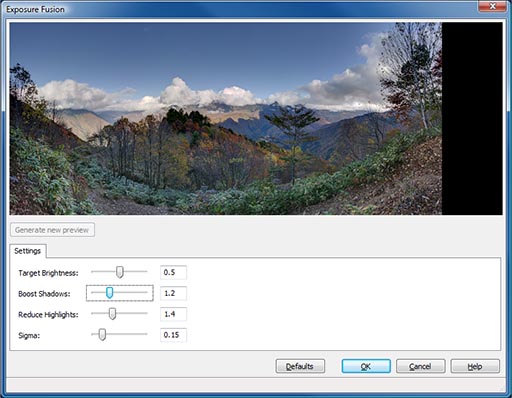
Next press the Fusion Settings button. Similar to the tone mapping preview, this opens a small preview of the exposure fused panorama, where the fusion settings can be adjusted:
Again, go to the Create Panorama tab to create the exposure fused panorama at full size.
Further reading
For HDR panoramas, multiple output files can be generated in a single stitching pass. Several HDR file formats are supported. For more information see the on line help for the Create Panorama tab, launched by choosing Help in the PTGui menu bar.Tone mapping is a complicated process, controlled by several parameters. To learn more about the PTGui tone mapper and its settings, press the Help button in the Tone Mapping Preview window.
For more information about linking source images, see the on line help for the Image Parameters tab.
Finally, section 7 of the Support page contains frequently asked questions on HDR.
Download the PTGui Pro trial version and give it a try!